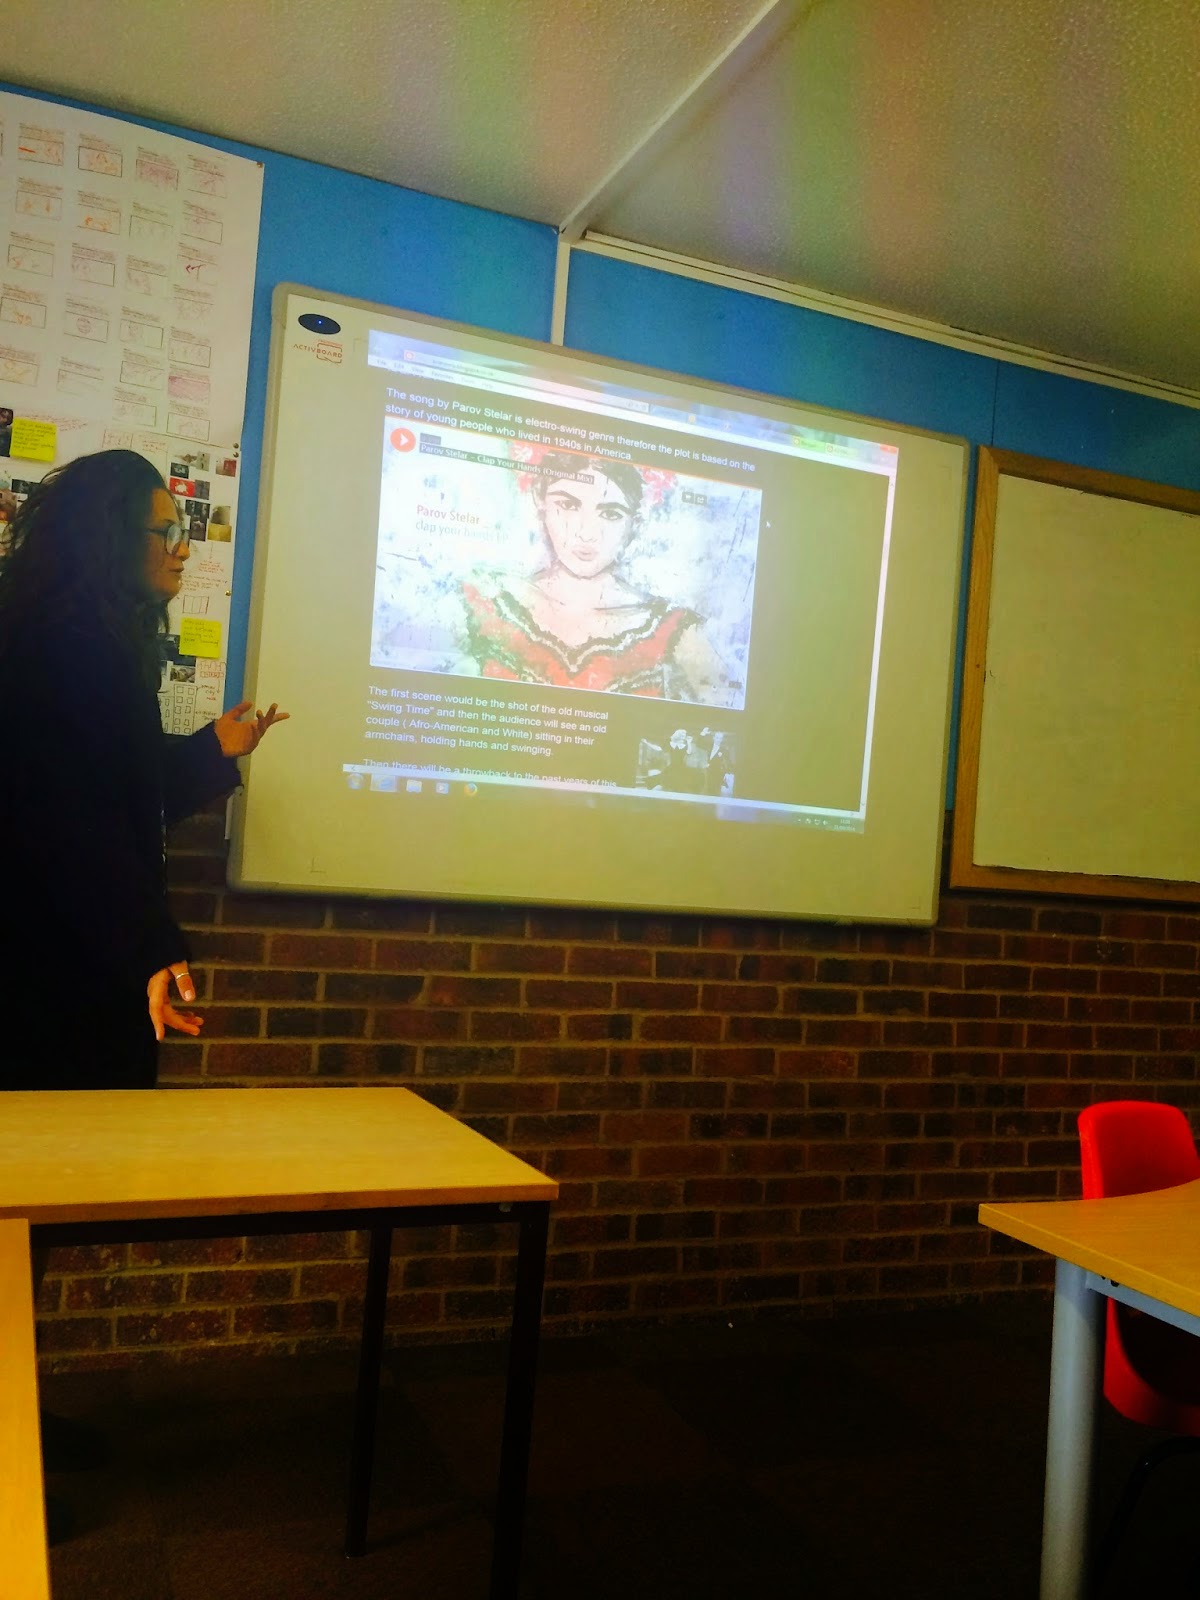
 First of all to make our final product we needed to come up with several ideas which in future we will present to the class and decided whether or not we can use one of them for our final piece. Therefore we were told during the summer to develop these ideas and make a Prezi where each of our initial ideas will be highly presented. Prezi helped me to make the presentation of my ideas more colorful and informative as I included videos and hyperlinks to different websites and then structure the future blog post with my initial ideas so then others people in the class can look at them any time.
 Everyone in our class presented their ideas and Phil split us in 3 different groups and in these groups we had to decide which idea we will take and work on it. Therefore we needed to help to develop or change the idea. The first idea was Harry’s who suggested to make a video “Waves” by Mr. Probz and for this idea we need a water tank. This idea had interested everyone in our group and we tried to work on it. We searched for one week for the water tank which can be transportable and won't cost a fortune, these are the websites we looked at for the product needed:http://www.ebay.co.uk/bhp/water-tank, http://www.screwfix.com/p/cold-water-tank-50gal-1190-x-610-x-500mm/10134,http://www.amazon.co.uk/aquariums-fishtanks/b?ie=UTF8&node=471501031,http://www.gumtree.com/pet-equipment-accessories/uk/glass+tank. However all our researches were not successful and we decided to discard this idea and start working on something new.
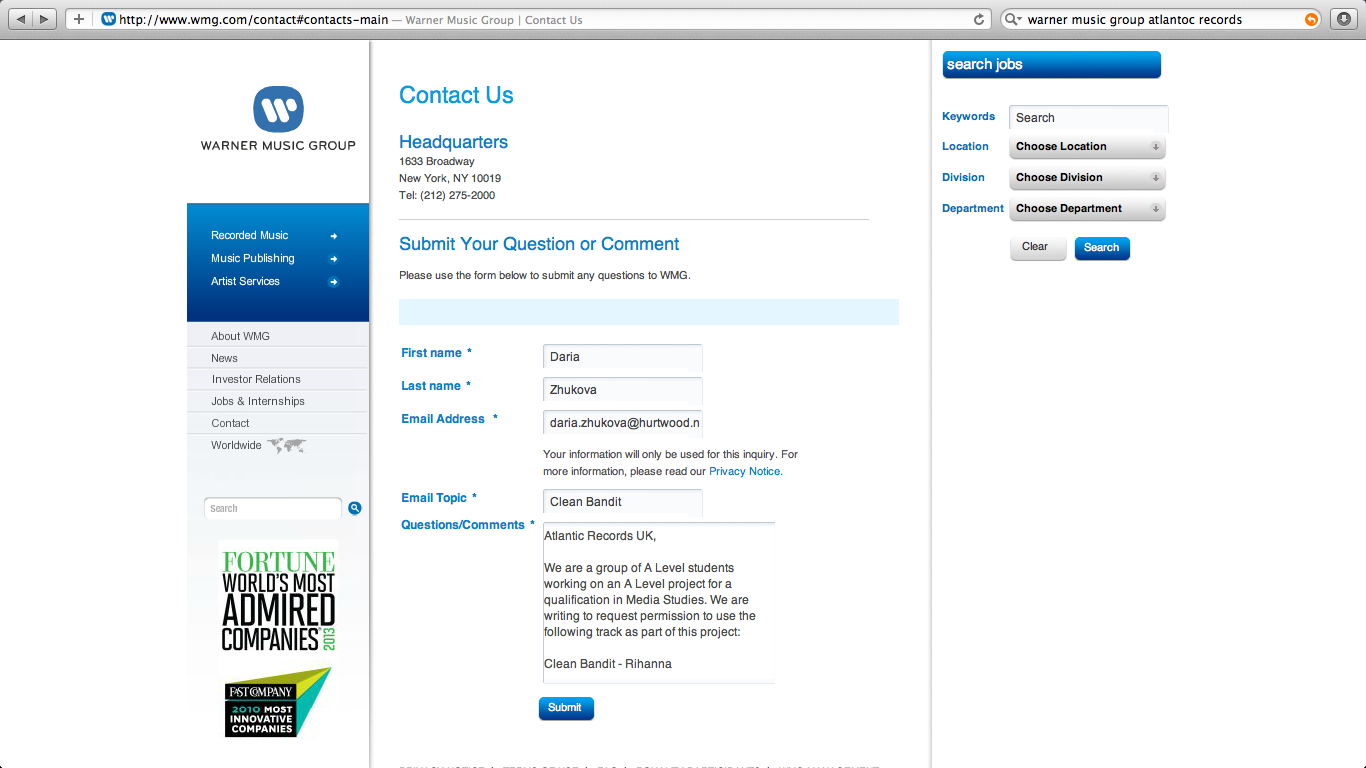 After the decision was made, chosen song by Clean Bandit “Rihanna”, we needed to develop the idea, find strong and weak parts in our planning and film the animatic which will help us to realise them. Before filming the animatic we made a planning review and a cast list as
 well as we e-mailed the Warner Music Group to ask their permission for using the song for our project. By e-mail we got in touch with potential actors and singer for the music video production and asked them for a first testing repetition and send them the music and the lyrics so they can prepare for it and be not confused and look natural. A few days later when our group was ready for a preliminary shooting we went to the studio and tried our first part of an animatic with the singer Isabel. Unfortunately, she didn't feel herself comfortable in front of the camera, despite the fact that it was just an iPhone not a real equipment and she didn't learn the lyrics properly so therefore her whole image was not right for our video and we decided to find another singer.
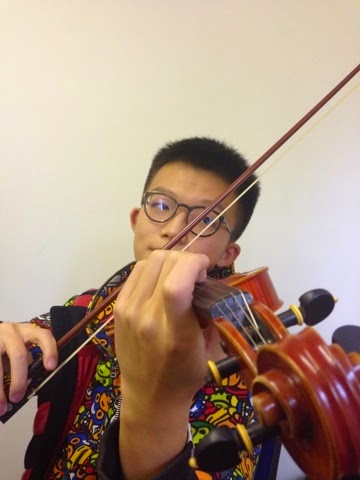 However, more successful parts of the animatic we made during violin and cello players and the dancers. The production of the animatic with an iPhone helped us to realise that the singer must be more positive and do not have any worries about standing in front of the camera.
 Also we tried a low motion effect while we took a video of dancers and we liked it, as every their movement now became more clear and moreover it’s suitable to the slow rhythm of the song. While we were doing an animatic and editing it in the iMovie we were thinking about future set designs and etc because shooting next to the green screen or outside helped us to realise that online through the website with different templates and also a Tate Modern Museum gallery where last year Yayoi Kusama’s exhibition took place. Also, we need props like feathers and we bought some on amazon.co.uk.
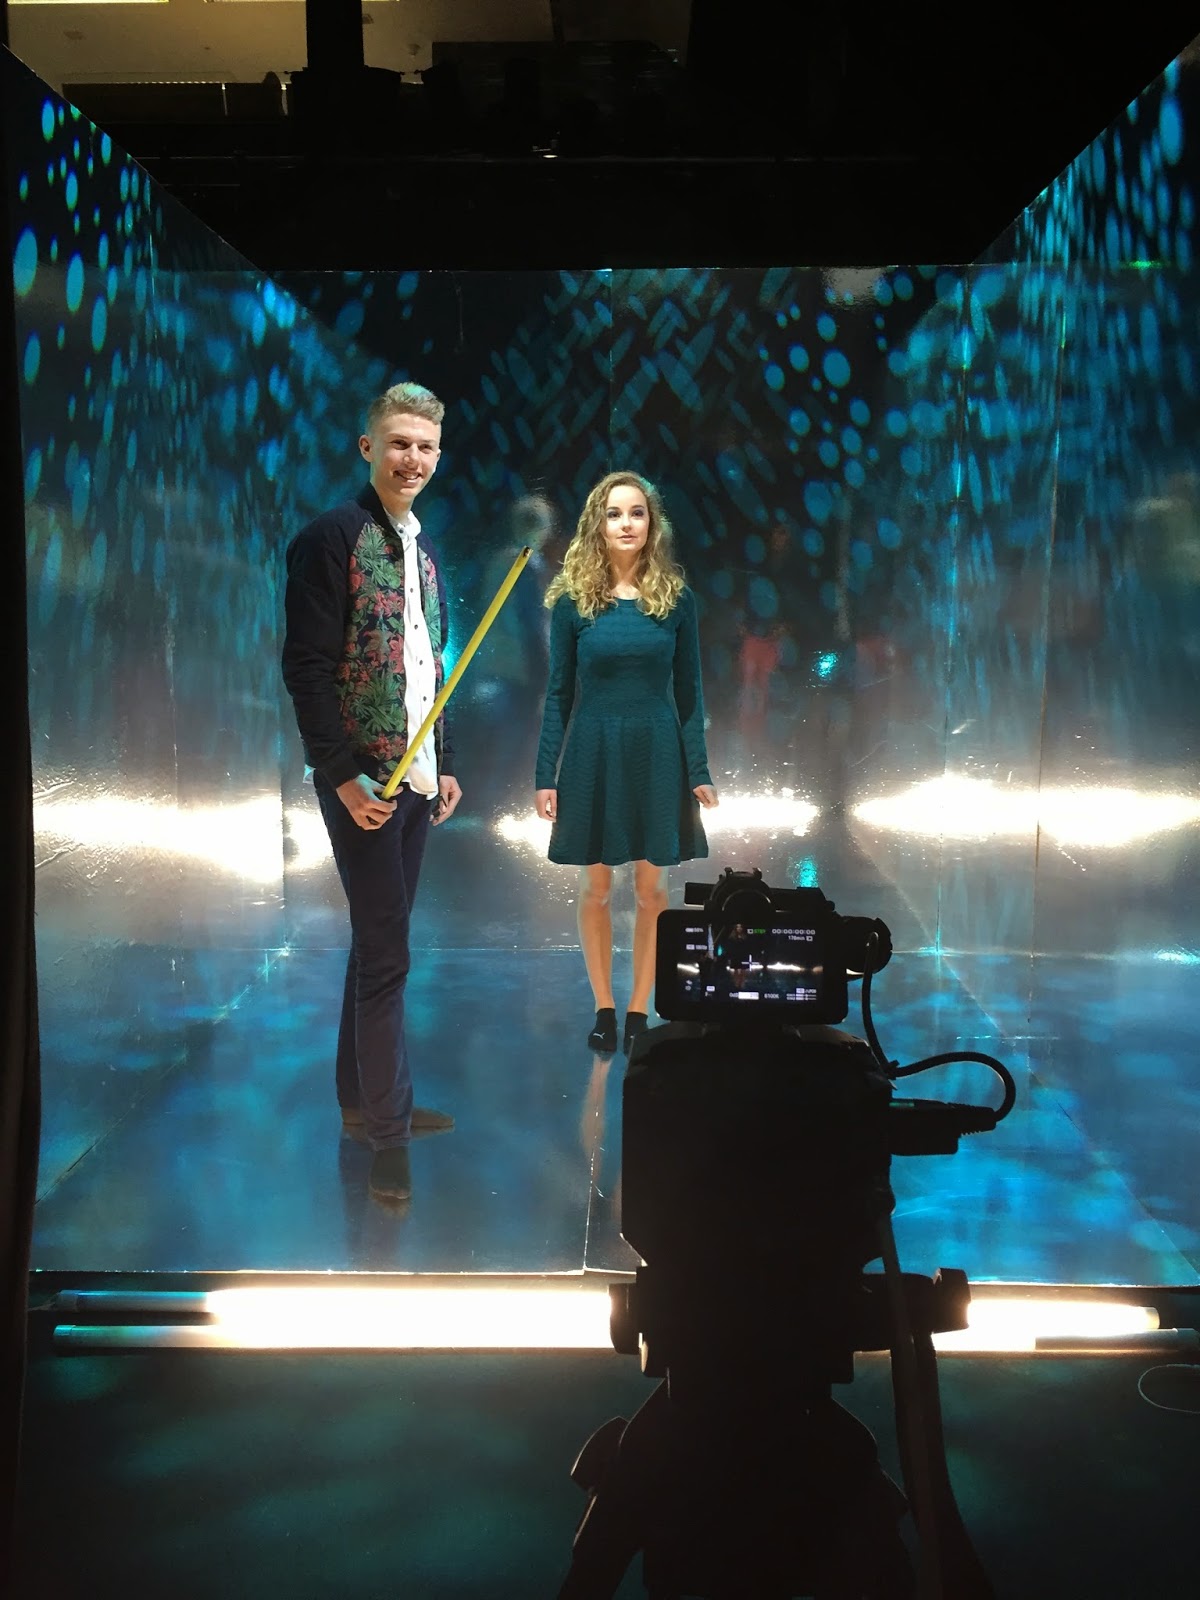 After the preparation was finished we were able to made our final product. We used camera Sony FS100 with prime lenses which gave s more beautiful image and bright colourslighting instead of having just the camera and actors we used a lighting equipment to create a feeling of a surreal atmosphere through a variety of circles projected on the wall.
 As this year we were creating a music video which involves sound and
After the shooting day we had to do the editing as well as to create a digipack and a website. Each process was started separately from others but in the middle of the process we as a group came together to a final look of the project and work in a set direction.


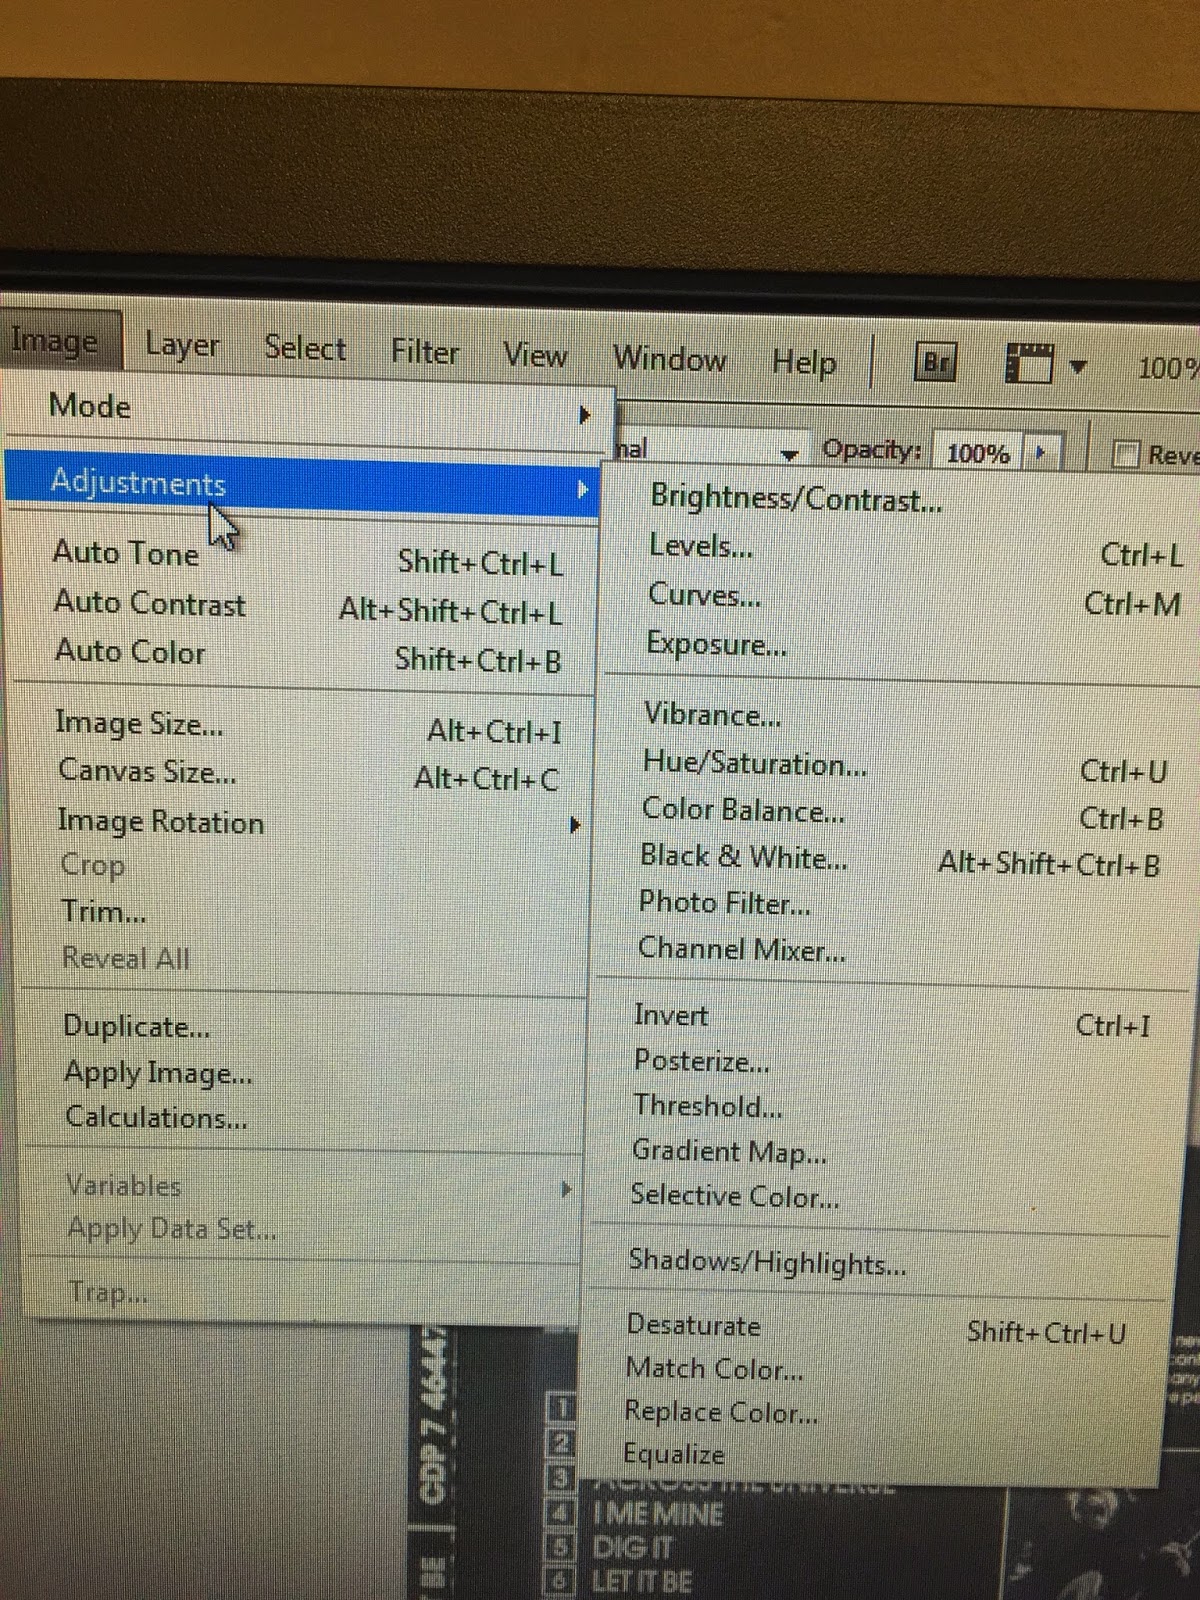
 The editing was done in Adobe Premier, this software helped us to create a final product looking as we wanted to. For the final version we as a group, especially Dmitry and Eden who worked constantly in the editing suit, made these steps. During the intro out of focus shots are used to gently and gradually reveal the set and the artist. We took a close up of singer when the lyrics start to introduce the artist after this we cut the scenes with a use of jump cuts- BCU of her turning away from the screen and then BCU of her looking out to the audience. Secondly, we used slow editing pace to fit the slow music track and then added many long cross dissolves to add surreal floating sensation. Afterwards we made some dissolves between the singer and musicians as well as between cellist and violinist for the visual representation of the instrumental component in the song to give the audience a deeper understanding of the song – appreciation of nuances of the different sounds and how they are made and combined to create the finished piece of music. Moreover, we overlaid shots of singer and instruments this adds surrealism to the video as it fits with the surreal sets and spotted backgrounds. The track has a very original arrangement of plinking synthesised sounds similar to a glockenspiel as well as the strings and all of the sounds have been synthesised to give a strange combination of classical and modern, dream-like quality of the video matches to the song.
object you are trying to latch onto, it easier and faster to use that the only reason why i used it.
However before we’ve done anything else, like before inverting it and then cutting to get the final shape we had to make sure the shape that we are cutting is the right size and to do this, we just need to hide the base layer by pressing the eye on the bottom right hand corner where the layer bar is and that just hides the layer. Then we faded the filter so that it is possible see both layers and makes it
 easier to make sure that the size of your circles is exactly where we want it to be. Finally when we have made sure that everything is in order and organized into the right place then we can invert the lasso tool line out that we have made, which deletes the outside of the image (circle) and not the inside,which is the part you want to keep to create that peacock pattern inside the circle. After this steps we had to design the layout of it placing the peacock patterns to where you want them to go.
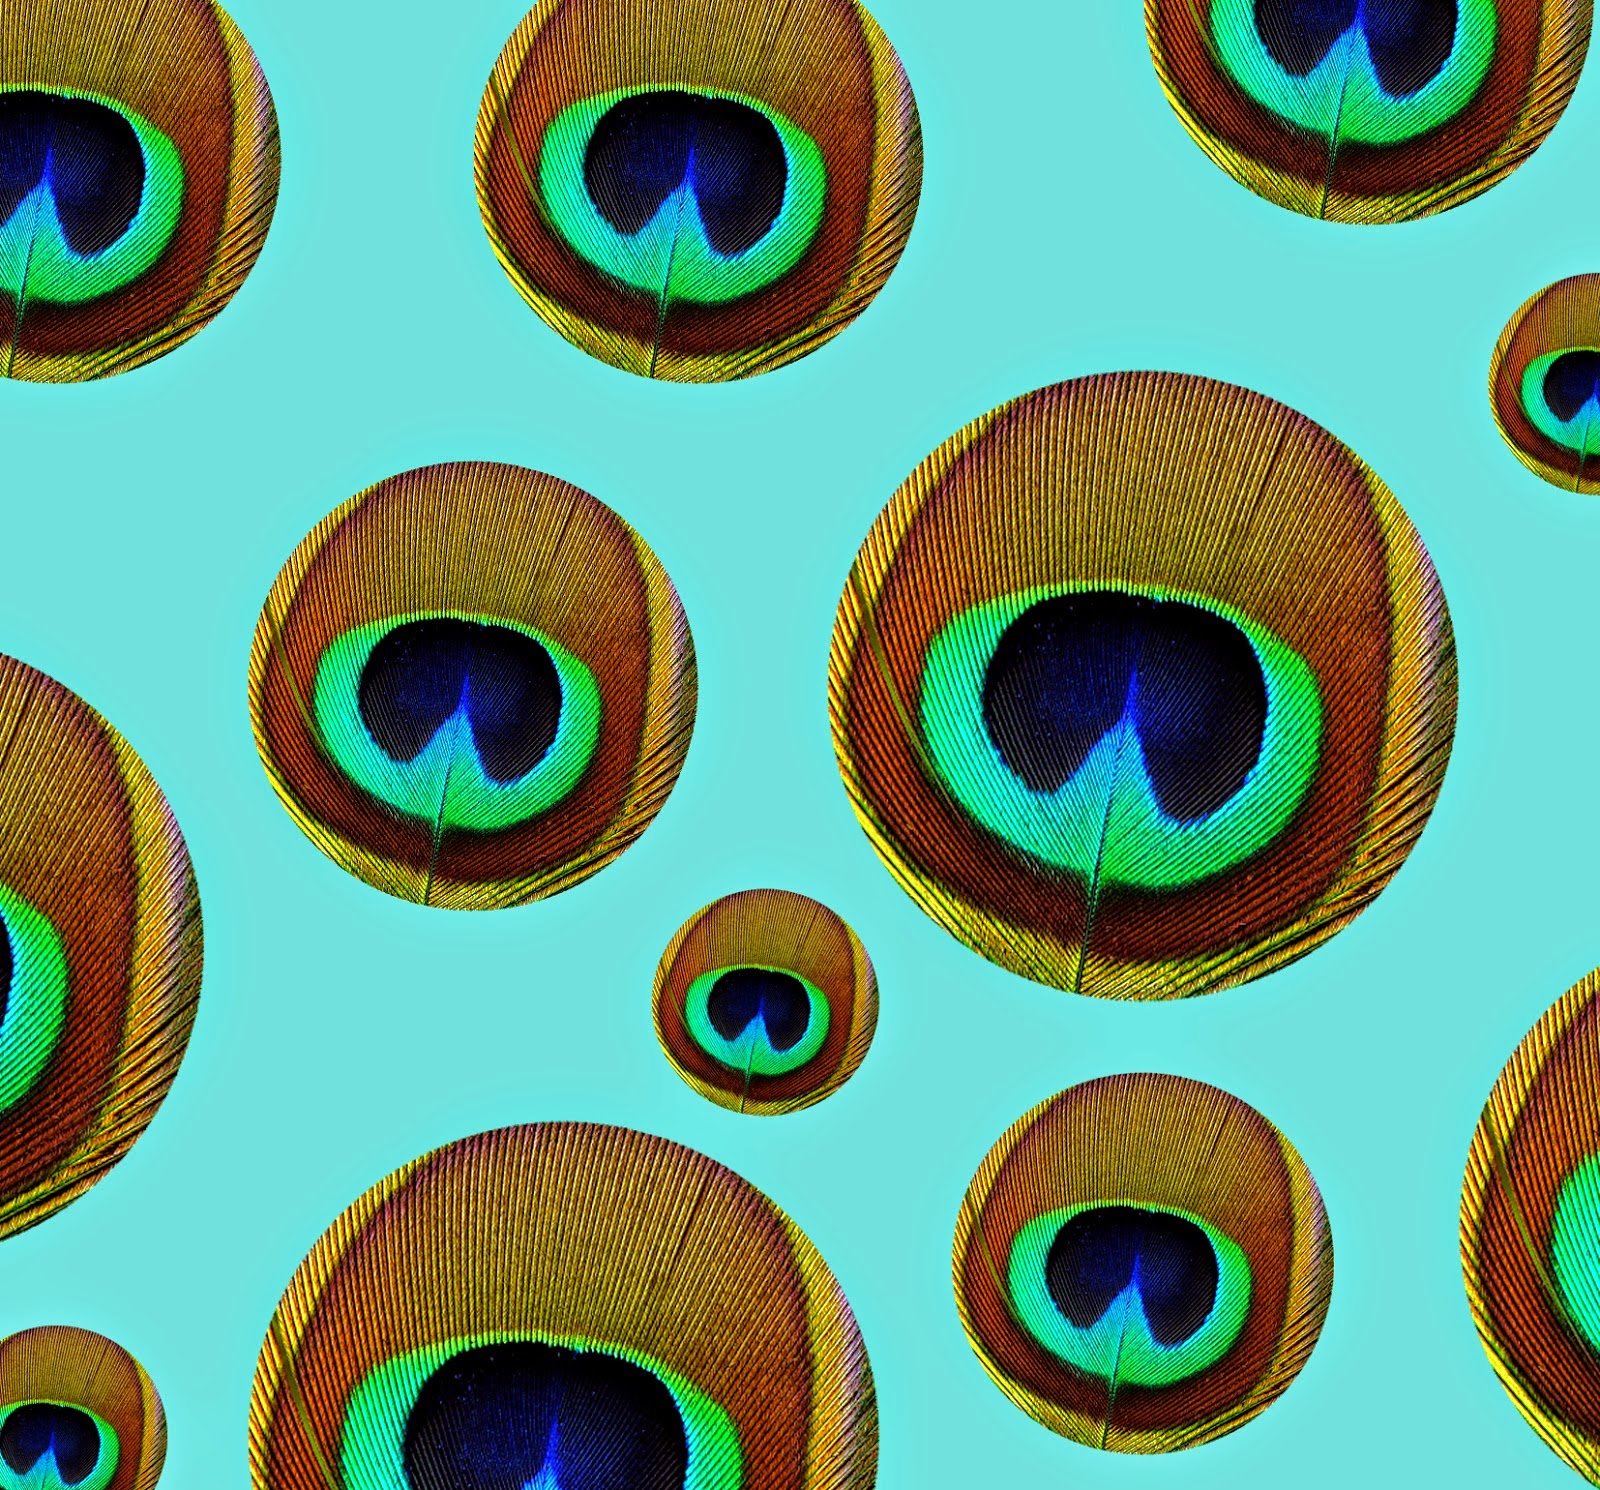 So making the peacock circles different sizes, Harry thought to give it a more interesting visual aspect towards it instead of having everything the same and also another thing which he did was rotate some of the patterns, which again just gave our audiences a more visual affect.Afterwards we have to create the shape of the circle to cut out the
image of the peacock pattern into the shape i wanted, which was to
create peacock pattern circles. So the first thing Harry had to do was
to draw out a circle on a new layer because working on different layers
makes it easier to work with and it makes things a lot more organized.
To get an out line of the circle shape which is what we are trying to do
we have to use the the genre and themes of our music artist, so we decided to keep the
theme of dots and simple circle patterns but they had to be colorful. Finally because of using Photoshop software the base layout was not the right shape for a square format so all he had to do at the end of editing and designing our digipack was just to crop the whole image to the right size.
So making the peacock circles different sizes, Harry thought to give it a more interesting visual aspect towards it instead of having everything the same and also another thing which he did was rotate some of the patterns, which again just gave our audiences a more visual affect.Afterwards we have to create the shape of the circle to cut out the
image of the peacock pattern into the shape i wanted, which was to
create peacock pattern circles. So the first thing Harry had to do was
to draw out a circle on a new layer because working on different layers
makes it easier to work with and it makes things a lot more organized.
To get an out line of the circle shape which is what we are trying to do
we have to use the the genre and themes of our music artist, so we decided to keep the
theme of dots and simple circle patterns but they had to be colorful. Finally because of using Photoshop software the base layout was not the right shape for a square format so all he had to do at the end of editing and designing our digipack was just to crop the whole image to the right size. 
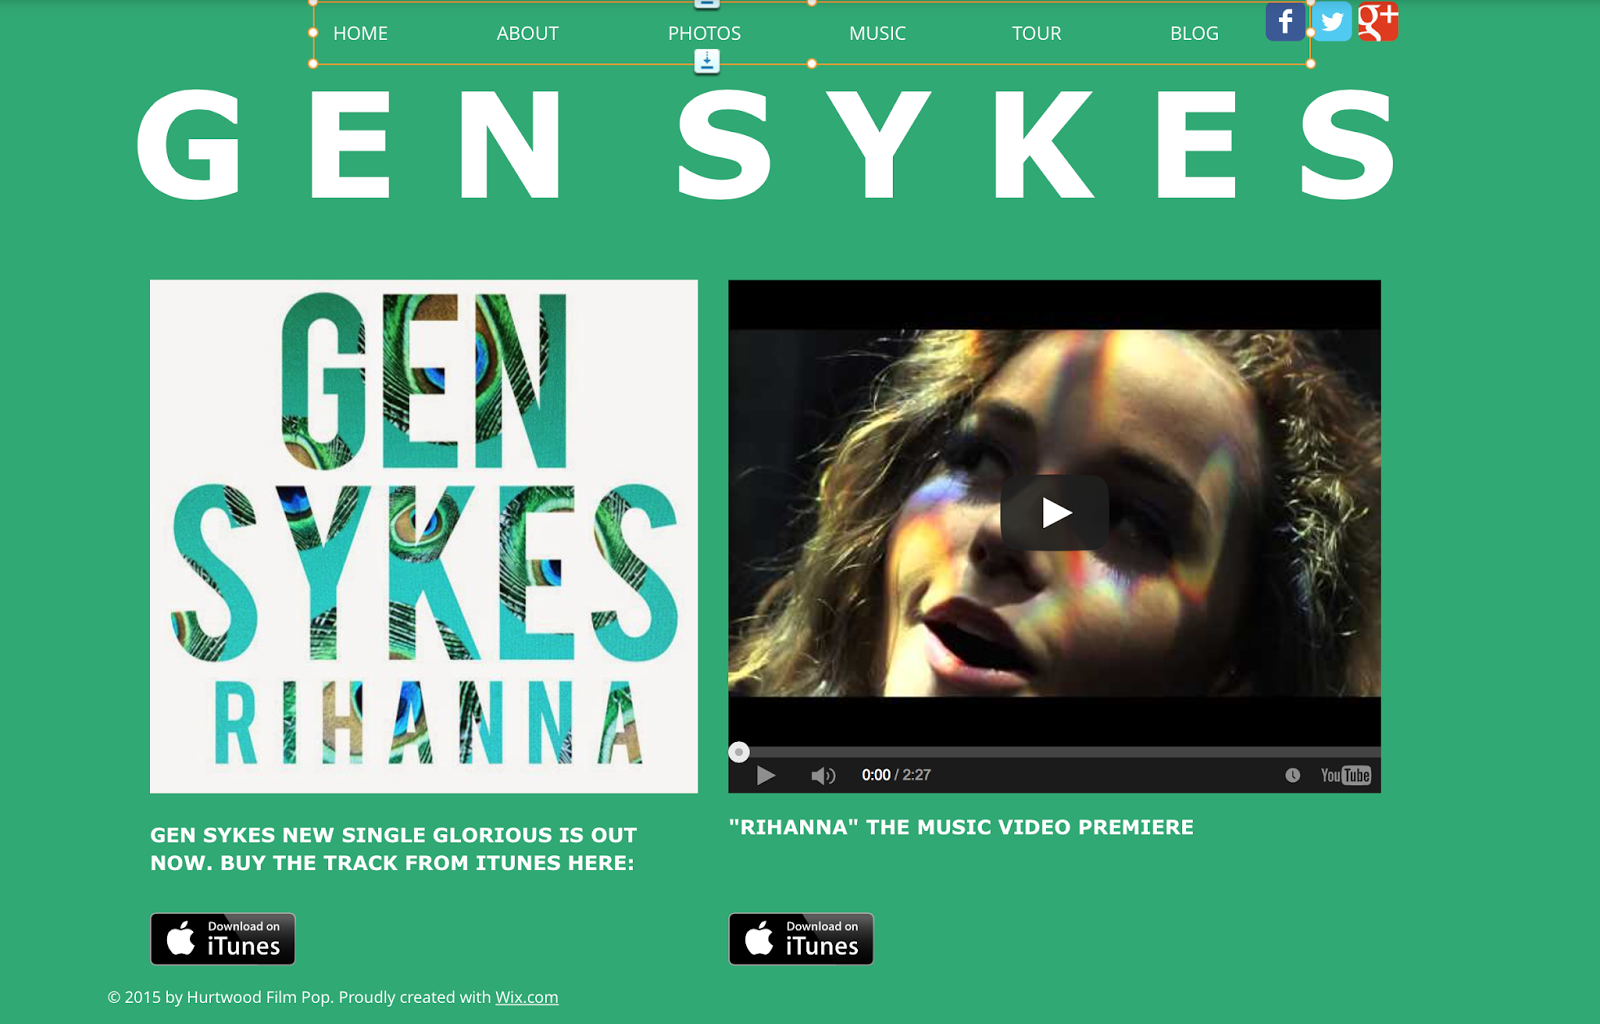
 The last product we needed to create was a website. For this purposes we have to use wix.com, I decide to spent more time on this product as I got interested with the wix.com from the last year. As a start-up we looked at different singer’ websites like Foxes, Lorde or Ellie Golding. These websites helped us to realize what we want to create and how it must look at the end. The template I chose from the represented by wix.com and started working on it. We decided to create several pages so the website will be informative for fans and also interactive therefore we decided on several colors. The font took a long time until we all agreed on it, as it suited the genre and the star image as well as the background. For the background in the beginning we agreed on plain colours like blue, green or pink as it is on Foxes website. But when Harry made a first digipack example we realised that the plain background can’t be used anymore because it didn’t look good therefore I decided to use Adobe Photoshop C64 where I could edit photos of a singer and then use them as a background.
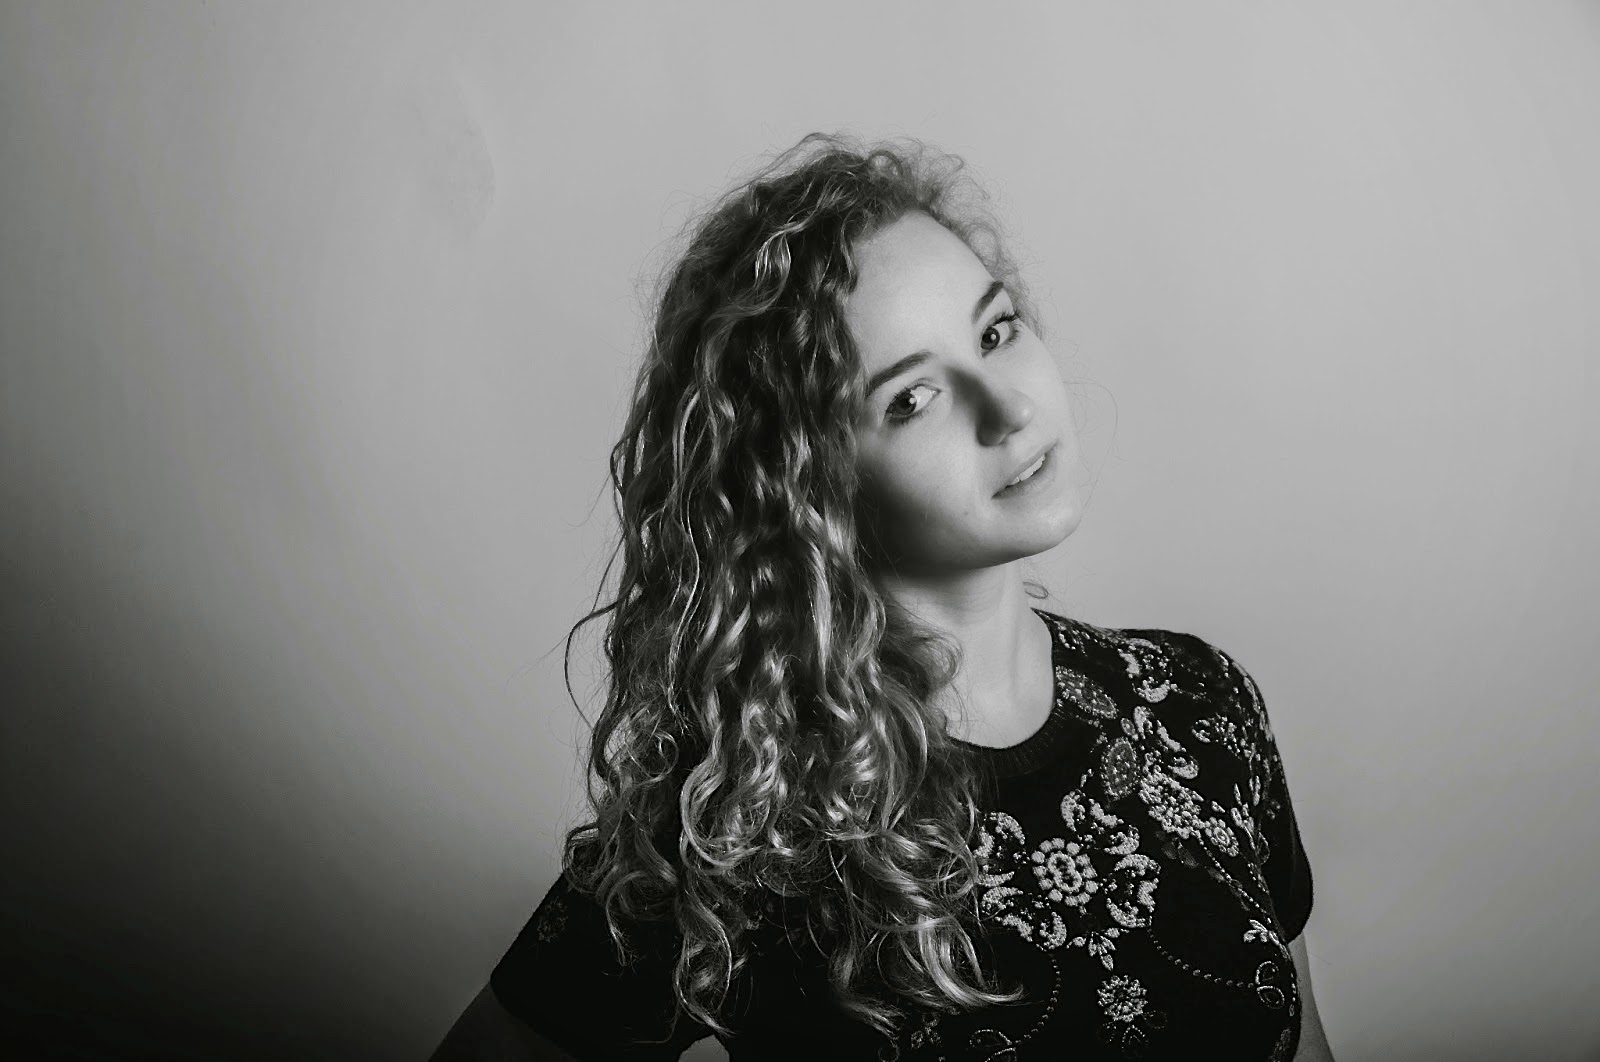 However before this I asked Harry to use his camera Nikon D190 to take several photos of the singer which we then can use for the background as well as for the ‘Photo’ page on the website. After the photoshoot Harry send me these photos by e-mail and I started editing them. I decided to change the pictures from black and white into colourful however I wanted to leave the singer black/white coloured and the background make colourful.
 be colourful but the image will stay the same.
Also, I used adjustments so the brattiness of the photos as well as the saturation will be decreased. I added all this on the website and finally uploaded all normal pics from the photoshot. Afterwards, we created a twitter account, gmail account, instagram and Facebook so then the website will include all these vital for modern audience of the online sphere. These accounts could help us to make the singer more popular among the target audience.
Finally, after all these products were finished we decided to cooperate with a focus group. We talked with them and asked several questions regarding them to find out how the target audience will react at products. All their recommendations and ideas we recorded via iPhone and afterwards used the audio files as evidence for changes which must be done immediately.
No comments:
Post a Comment